In the last article, we discussed 'All About The Validator In Ethereum 2.0 Beacon Chain'. In this article, we'll learn how to set up a validator node for Eth2 on Teku using Geth for Eth1.0 chain. Hopefully this guide will be helpful for those who are interested in becoming an Eth2 validator.

Ethereum 2.0 Overview
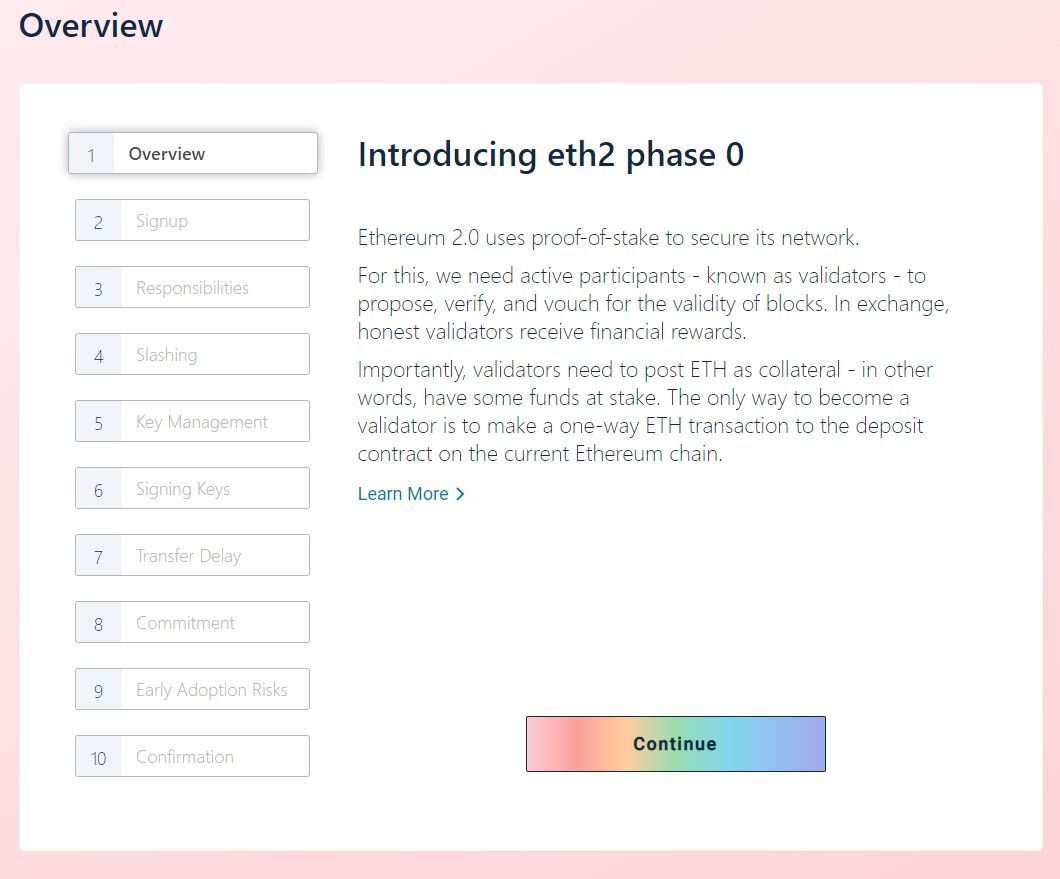
Ethereum 2.0 is a multi-year initiative to boost the scalability, and programmability of Ethereum blockchain, without sacrificing on decentralization. In comparison to the existing Ethereum 1.0 chain with proof0of work (PoW), eth2 uses proof-of-stake (PoS) to protect the network. Validators are the active participants responsible for protecting the network and obtain continued compensation for tasks that help the network achieve a consensus.
Eth2 Validator Launchpad
The concept behind the launch pad is to simplify the operation, without losing protection and education, to become an eth2 validator. The execution of your own validator, unlike using a third party service, is the control of your own keys. This obligation creates an inevitable balance between ease of use, protection and education.
Minimum Hardware Requirements
- Operating System: 64-bit Linux, Mac OS X, Windows
- Processor: Intel Core i5-760 or AMD FX-8110 (or better)
- Memory: 4GB RAM
- Storage: 20GB available space SSD
- Internet: Broadband internet connection (10 Mbps)
- Power: Uninterruptible power supply (UPS)
Digital Ocean Equivalent:
Standard Droplet=>
- Memory: 4GB RAM
- Storage: 80GB available space SSD
- Uptime: 99.99%
- Availability: 8 Data Centers
- $/HR: $0.030
- $/MO: $20
What are different phases?
The transition from proof-of-work (PoW) to proof-of-stake (PoS) would be in at least 4 phases each focused on a different part of eth2.
- Phase 0 involves all the computers behind the eth2 PoS consensus, monitors the validators and their balances.
- Phase 1 is used to add, store and retrieve data associated with eth2 shards.
- Phase 1.5 updates Ethereum as we know it today from PoW to PoS by converting it into a shard under eth2.
- Phase 2 applies execution to the remaining eth2 shards that allow smart contracts to execute on all shards.
Rewards
Rewards are not set, but adjustable (depending on the amount of eth involved in the network). If the total amount of ETH involved is minimal, the yearly reward is high, so as the total stake increases, the reward earned by each validator begins to decrease.
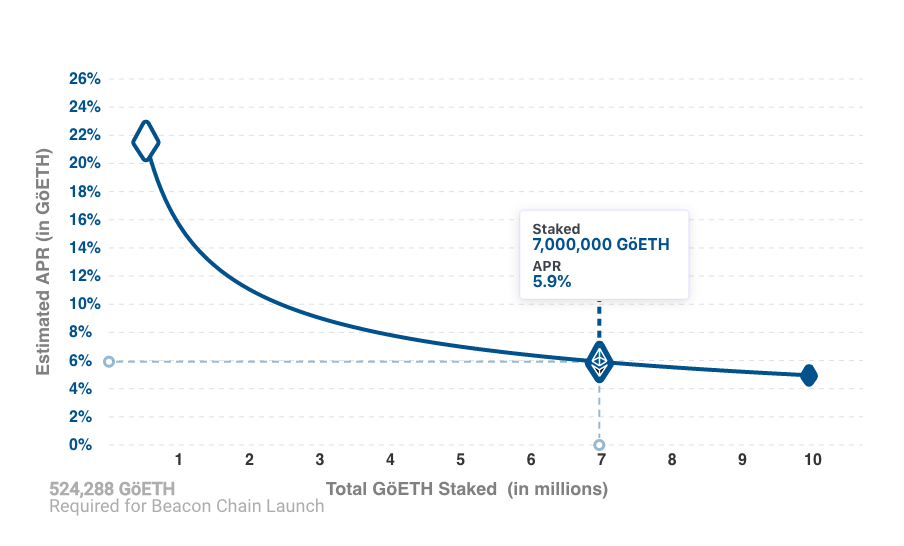
Rewards are expected to be adjusted in the first Eth2 upgrade perhaps in the summer of 2021.
Get Started
You would need to run an eth1 client parallel to eth2 client in order to handle incoming validator deposits from the eth1 chain. Although it is possible to use a third-party provider such as Infura, running own client is highly recommended to ensure that the network is as decentralized as possible.
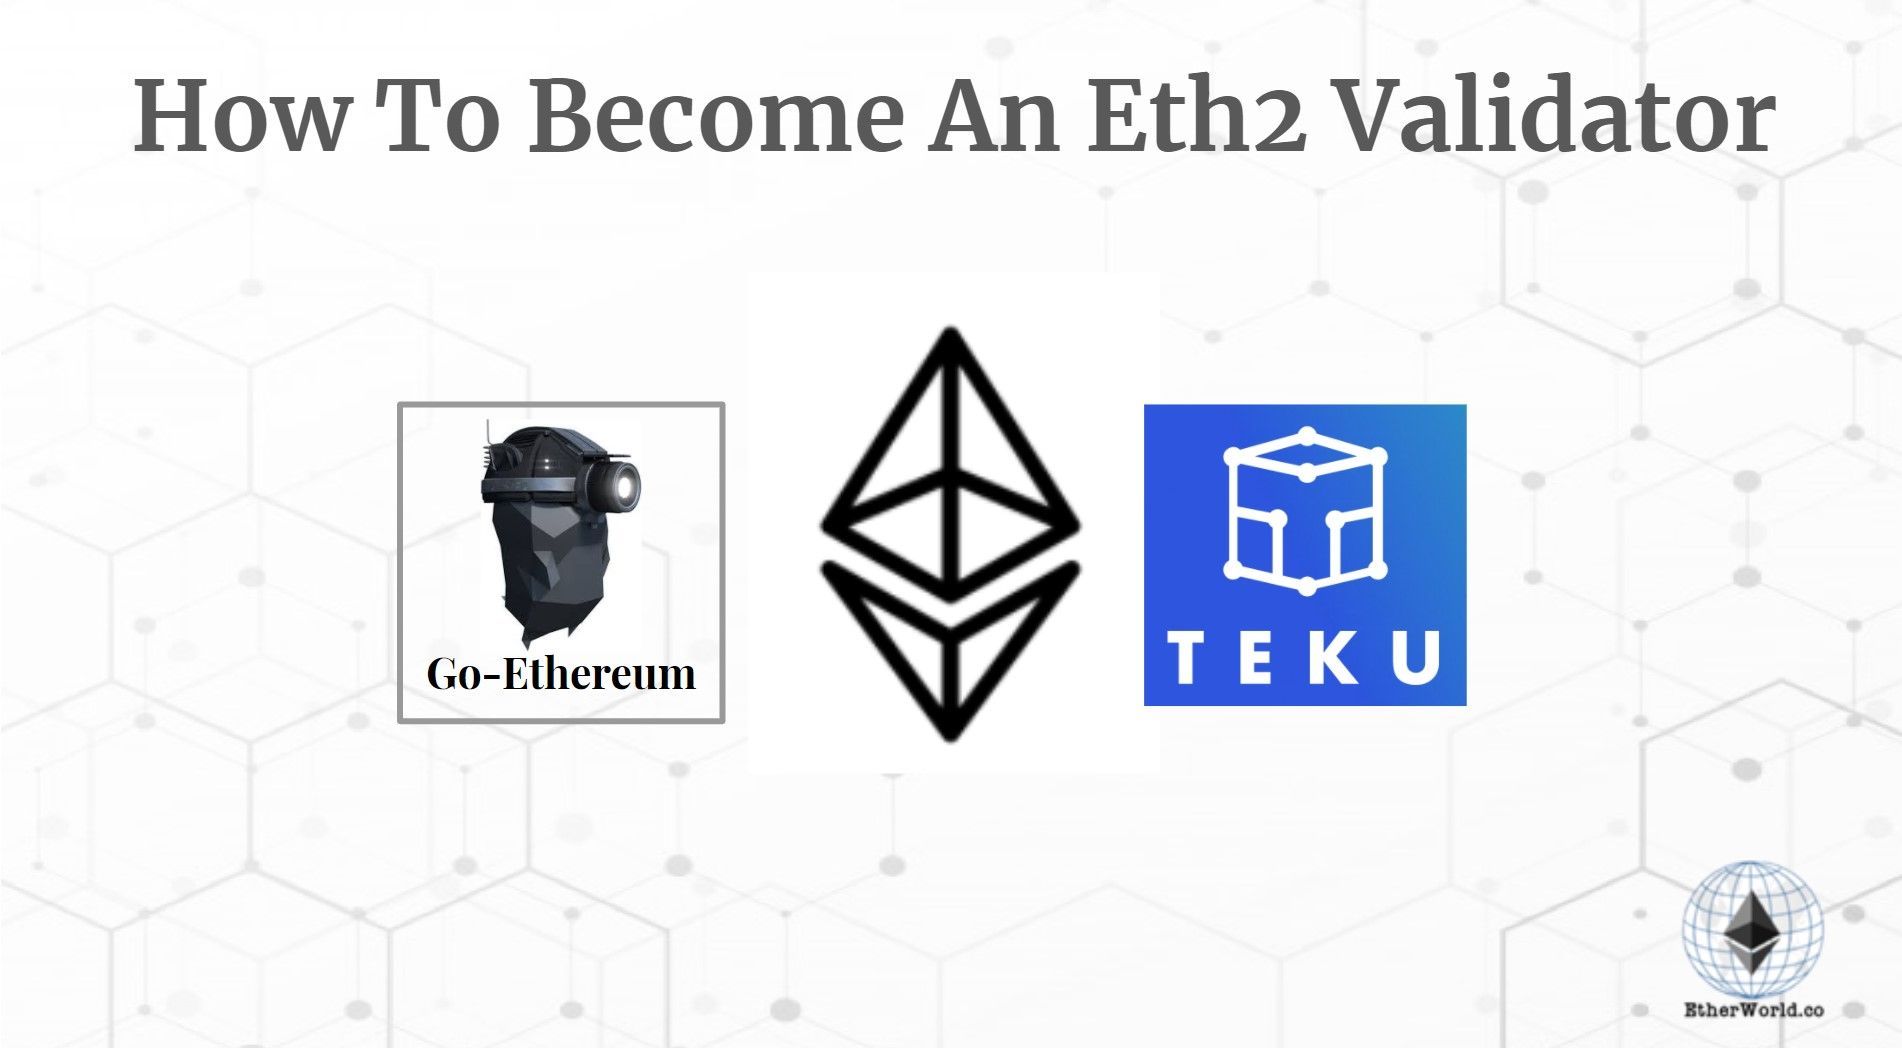
Using Go Ethereum (Geth) for Eth1 Client
Go Ethereum is one of the three preliminary implementations of the Ethereum Protocol (alongside C++ and Python). It is written in Go, completely open source with a GNU LGPL v3 license.
Installation
We can use a number of options to install Go implementation of Ethereum.
All versions of Geth are available and can be downloaded from Geth
Geth for Windows
The installer and a zip file are available for download. Geth is immediately put into your PATH by the installer. The zip file includes the command .exe files which can be used without activation.
Steps :
- Downloading zip file
- Extracting geth.exe from zip
- Opening Command Prompt
- chdir() (It moves the current working directory to the directory specified in the direction of the calling method.)
- Opening geth.exe
Geth for Mac
Steps :
- Go to this link=>Hombrew and install it.
- Run the commands=>
brew tap ethereum/ethereum
brew install ethereum
This is done to add the tap and installing geth
- Run the commands=>
brew install ethereum --devel
This is done for installing branch.
- After Installation ; Run the commands=>
geth account new
This is done for creation of an account on your node.
Geth for Ubuntu
The best way to run go-ethereum on Ubuntu distributions is to install PPAs set up in the launchpad (Personal Package Archives).
Steps :
- Run the commands=>
sudo add-apt-repository -y ppa:ethereum/ethereum
This is done to enable our launchpad repository
- Run the commands=>
sudo apt-get update
sudo apt-get install ethereum
This is done to install the stable version of go-ethereum
Use geth --help for for command line options.
Follow this link=>CLI
Once we're ready with the Eth1 client, we will select the Eth 2 client to set up a node. In this case, we're selecting Teku.
Teku for Eth2 Client
Teku is a complete Ethereum 2.0 client built to satisfy institutional specifications and security requirements. Written in Java, Teku has been retained to provide corporate facilities with the assistance of the same Besu (Eth1 client) team. Teku provides the full implementation of the Beacon node and the validator client to assist in the consensus. PegaSys is a ConsenSys arm devoted to developing enterprise-ready clients and tools for communicating with the main Ethereum network. Teku is Apache 2 licensed and written in Java, a language that is exceptional for its maturity and ubiquity.
Why do we want to select Teku?
- Executes synchronization and consensus of the Beacon node.
- Proposes and attests to the blocks.
- Provides business-focused measurements to Prometheus.
- Has REST APIs to handle Eth 2.0 Node Operations.
- Has external key control to handle key signature validator.
Installation
- Step 1 : Installation of Java
Teku needs Java 11+ to be compiled; older versions are not supported.
Follow this link for installation=> Java
- Step 2 : Cloning the Teku repository
Run the commands=>
git clone https://github.com/Consensys/teku.git
This is done to clone the Consensys/teku repository.
- Step 3 : Building Teku
Go to teku directory and Run the commands=>
./gradlew distTar installDist
This is done to build Teku with the Gradle wrapper gradlew.
- Step 4 : Changing Directory
Run the commands=>
cd build/install/teku
- Step 5 : Confirmation
Run the commands=>
bin/teku --help
Starting
Indicate valider options with the teku command to start the beacon chain customer and validator as a single operation. To load the encrypted keystore file(s) and associated password(s), use the --validator-keys option to set the directory or file.
Run the commands=>
teku --network=pyrmont --eth1-endpoint=http://localhost:8545 \
--validator-keys=validator/keys/validator_888eef.json:validator/passwords/validator_888eef.txt \
--rest-api-enabled=true --rest-api-docs-enabled=true \
--metrics-enabled
Deposit ETH
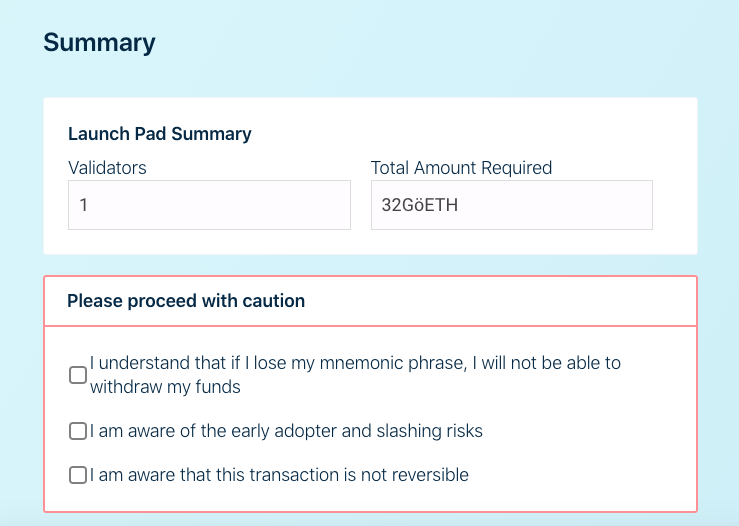
You need to deposit 32 ETH per validator that you want to run to become a validator on eth2. This is a one way and non reversable tranfer.
It is highly recommended to use Validator Launchpad to make the deposit.
Along with the sign-up comes responsibility. The validator who is online and consistently engage in the consensus will earn incentives. Going offline may end up to penalties in extrme cases.
Click on=> I accept , Continue
Responsibilities
Only validators who consistently engage in the consensus will earn incentives. Many that are offline are being penalized. Penalties for going offline are equivalent to incentives for engaging actively.
Click on=> I accept , Continue
Slashing Risks
Validators who behave maliciously or in contravention of the specification are liable to be slashed (incur a significant penalty).
Click on=> I accept , Continue
Backup Mnemonic
Unique mnemonic (or seed) are derived from validator key. The ONLY Option is your seed to revoke your finances.
Click on=> I accept , Continue
Signing Keys
This Launchpad lets you build the keys for each of your validators. These keys will be kept in key stores and you will need to send them to your validator app to start validating. You will also be presented with a deposit file to upload to this website with the public keys for your validator.
Click on=> I accept , Continue
Transfer delay
Transfers between validators would be disabled until at least phase 1. Validators would have to wait until phase 2 (approximately two years) to be able to withdraw to a particular shard.
Click on=> I accept , Continue
Long-term commitment
With transfers disabled after at least phase 1, there is no option for the validator to leave willingly and then restart afterwards. This means that the validators ought to be in it for a long time.
Click on=> I accept , Continue
Early adopter risks
Validators are taking part in the initial launch of the new network. Like for every modern piece of tech, there's room for software glitches. Possible bugs can result in slicing, although impossible.
Click on=> I accept , Continue
Confirmation
You will create the new eth2 key pairs to become a validator. You need to be theoretically capable of executing commands in a terminal on a device to do this and install the validator program.
Click on=> I accept , Continue
Key Generation
If you have acknowledged the risks and responsibilities, the dapp advises you how to use the independent command line interface (CLI) app to create your offline keys.
Step 1: Selection Of Language
You will be asked to choose your preferred language when joining the interactive CLI
Please choose your mnemonic language (czech, chinese_traditional, chinese_simplified, english, spanish, italian, korean) [english]:
Step 2: Typing Password and Generation of Mnemonic
To secure your keystores, you will be asked to type a password
Type the password that secures your validator keystore(s):
Confirming your password correctly creates your mnemonic (24 words that are used to create your private keys).
Repeat for confirmation:
Mnemonics is another way to preserve secrets, because it's a much easier way for people to store and back up their private keys.
Step 3: Writing Mnemonic
Write it down and store it safely (you'll use it to get your deposit back)
This is your seed phrase. Write it down and store it safely, it is the ONLY way to retrieve your deposit.

crater positive retire course wide arch ring zoo leader cup steak head spoon host about acquire across duck firm frog raccoon gasp exist valid

Press any key when you have written down your mnemonic.
Step 4: Generate keys, keystores, and deposit data
Please type your mnemonic (separated by spaces) to confirm you have written it down:
When you've proven that you've written your mnemonic, you'll get the keys
##### #####
## ##### ##
### ## ####### #########################
## ## ##### ## ##
## ##### ## ##
## ## ## ###
######## ## ####
## ## ### ##### #####
# ## # #####
# # # #####
## ## ##
## ## ##
## ### ## ##
############### ## ##
### ## ##
############################# ##
## ###
####### ################# ###
## ## ## ## ## ###
############## #############
Creating your keys.
Saving your keystore(s).
Creating your deposit(s).
Verifying your keystore(s).
Verifying your deposit(s).
Success!
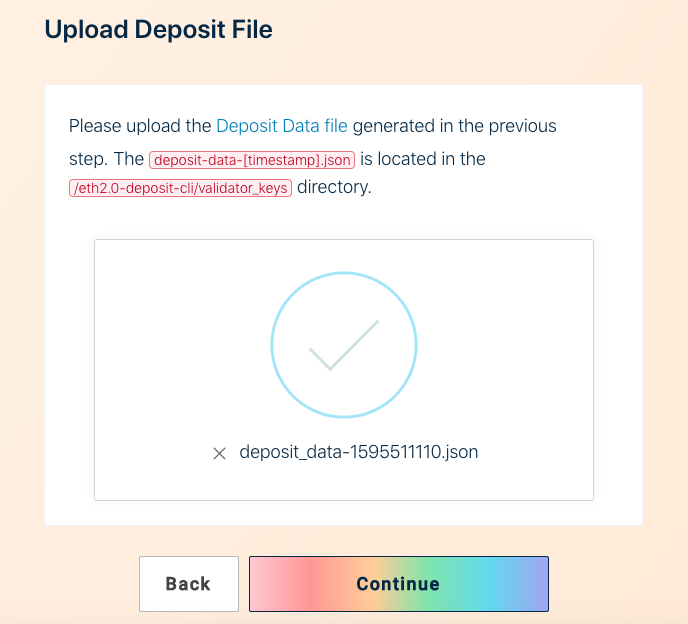
Your keys can be found at: <YOUR_FOLDER_PATH>
Transactions
After you've produced your keys securely, we'll walk you on how to upload your public keys online, where they'll be tested and sent to the deposit contract.
We verify that the data you submit is correct.
And then assist you in sending those transactions off.
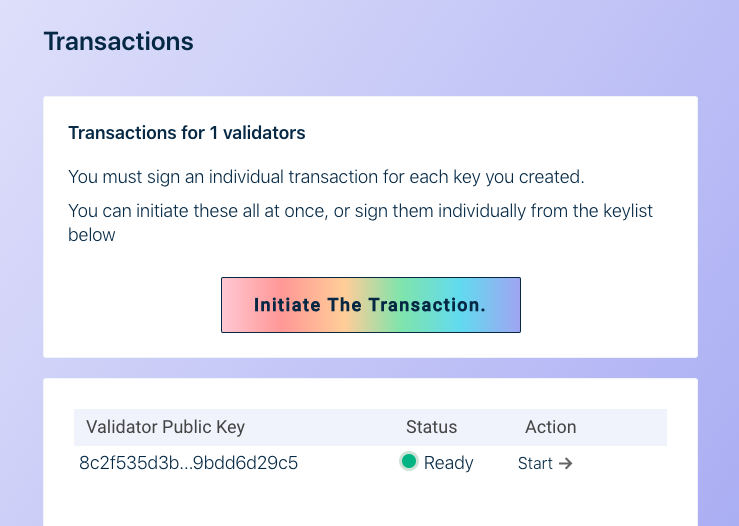
You were effectively stored on eth2 and dedicated to being a validator.
Reference Link=>
This article is created for educational purpose only. Please read the disclaimer section below.

Other reads on Ethereum 2.0
- Ethereum 2.0 Basic Terminology
- EtherWorld's Good Read on Blockchain & Cryptocurrency
- Crypto exchanges offering Eth2 staking services
- Minimal Slashing Condition in Ethereum
Disclaimer: The information contained on this web page is for education purpose only. Readers are suggested to conduct their own research, review, analyze and verify the content before relying on them.
To publish press releases, project updates and guest posts with us, please email at contact@etherworld.co.
Subscribe to EtherWorld YouTube channel for easy digestable content.
Support us at Gitcoin
You've something to share with the blockchain community, join us on Discord!